Build Your Own Gaming PC – Here’s a Comprehensive Guide!

Introduction
Building your own gaming PC can be a fun and rewarding experience. Not only does it allow you to customize your system to your exact specifications, it can also save you money in the long run. Plus, building a gaming PC gives you the opportunity to learn more about how computers work and upgrade components over time.
This comprehensive guide will give you step-by-step instructions on how to build your own gaming PC, from researching components to optimizing performance. We’ll also cover topics such as installing an operating system and setting up drivers and software. So let’s get started!
Researching Components
Building a gaming PC requires careful research and planning. To make sure you have the best possible setup for your system, you need to research each component individually. This includes graphics cards, processors, motherboards, and more. Here are some tips for researching components:
- Know your budget: It’s important to decide on a budget for your PC build upfront. Doing so will help narrow down the list of components you need to research.
- Understand what type of components you need: Different components interact with one another, so it’s important to understand what type of features and specs each component needs in order to work with the rest of your system.
- Learn about different brands: Research the various brands and models of components available to find the ones that best fit your needs. Pay attention to reviews and benchmarks to determine which components offer the most value.
- Read guides and tutorials: There are plenty of helpful resources online that can guide you through the process. Reading PC building tutorials can help you gain the knowledge needed to choose the best components.
Doing thorough research is key to building a successful PC. Taking the time to learn about the components you need to buy and understanding how they will work with the rest of your system will ensure that you have the best gaming experience possible.
Putting Together the Pieces
The first step to building a gaming PC is putting together all the pieces. This can seem daunting at first, but with our step-by-step instructions, you’ll be up and running in no time! We’ll show you how to assemble the components, explain why certain steps are necessary, and discuss important safety precautions.
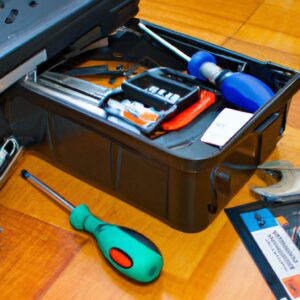
Before you get started, make sure you have all the necessary tools and equipment: anti-static wristband, screwdriver, Phillips head screwdriver, and thermal paste. It’s also a good idea to lay out your components in the order you’ll use them.
The first step is to install the processor into the motherboard. Make sure you line up the pins correctly and only apply enough force to press the processor in place. Once the processor is in place, you can install the RAM modules. Again, be sure to line up the notches and firmly press the RAM module into the slot.
After that, you can install the cooler on the processor. Make sure the cooler is positioned correctly and use the included screws to secure it in place. Now you can move on to the graphics card. Line up the PCI-E slot and use the included screw to secure it. Repeat this step for any other expansion cards you have.
With the major components installed, you can plug in the power supply. Make sure to pay attention to the labels and connect the correct cables to the corresponding ports. You can then move on to plugging in the front panel connectors like USB, audio, and power button. Finally, you’ll need to attach the storage devices such as the hard drive and SSD to the motherboard.
Once you’ve completed these steps, you’ve successfully assembled a gaming PC! Make sure to double check everything to ensure everything is properly connected. You should also familiarize yourself with safety guidelines and keep your work space free of distractions while building your PC.
Installing an Operating System
Whether you are a PC gaming novice or a tech-savvy veteran, installing an operating system is a vital step in building your first gaming PC. One of the most popular choices when it comes to OS installation is Windows, with several versions available depending on your needs and preferences. An alternative for gamers is Linux, a Unix-like open-source operating system that offers robust performance and design.
Installing either Windows or Linux on your gaming PC follows the same basic steps:
- Create a bootable installation media.
- Insert the install media into your computer and boot up.
- Set the PC to boot from the install media.
- Select the correct drive for installation.
- Follow the on-screen instructions to finish the installation.
Before you begin the installation process, make sure to check the requirements for the OS version you have chosen. This will help you ensure that you are meeting all of the necessary requirements and will help the installation process go smoother.
It is also important to note that regardless of what OS you decide to install, you should always remember to regularly back up your data. Doing so will help protect your personal files should anything go wrong during the installation process or afterward.
Setting Up Drivers and Software
When setting up drivers and software for components of your gaming PC, it is important to take the time to ensure that everything is done properly. Installing the correct drivers and software is essential for your PC components to be compatible with your system.
To begin, make sure you have access to the correct setup files for each component. You may need to download them from the manufacturer’s website or visit the support page to get the latest version available. Once you have all the driver and software files, disconnect your Internet connection if you have one. This will help prevent any automatic updates, which could disrupt the install process.
Next, start the installation process for each component one at a time. Carefully follow the instructions on screen and enter any information required. During the install process, you may be asked to restart your PC. Do so to complete the installation of each component.
Once all components are installed, check online for any software or driver updates for your PC components. You may need to manually download and install these updates. Be sure to always update components with the most recent versions available.
Finally, if you encounter any problems when installing drivers and software, consult the component’s user manual and the manufacturer’s website for assistance. Many times they provide helpful troubleshooting tips and solutions that can help you solve any issues you come across during the installation process.
Optimizing Performance
Making sure your gaming PC is running at its best is key for maximizing performance. There are several ways to optimize the performance of your system, such as tweaking settings, disabling startup programs, and overclocking the hardware. Here, we will provide you with detailed information on how to do all these steps in order to maximize your system’s potential.
Tweaking Settings: Tweaking certain settings is a great way to improve your PC’s performance. This applies to both hardware and software settings. For example, if you want to squeeze extra performance out of your CPU or GPU, you can manually overclock them to get more power. Additionally, you can also head up to the Control Panel and tweak settings that might be affecting performance, such as changing the power plan or disabling any unnecessary services.
Disabling Startup Programs: Unnecessary programs running in the background can have an impact on your system performance. To free up system resources, you can disable programs that run at startup. Click the Start menu and type in “msconfig” in the search bar. From the list of programs, you can identify which ones are essential for booting up and disable the rest.
Overclocking: Overclocking is the process of increasing the clock frequency of a certain component, such as the CPU or GPU. This will result in increased performance but could also affect the system stability. Therefore, it is important to proceed with caution and use the right tools to make sure your PC remains stable. A good place to start is using the manufacturer’s tool for overclocking.
Conclusion
Building your own gaming PC is both challenging and rewarding. You get to create exactly the system you want and according to your own budget, and the satisfaction of seeing your creation spring to life is unparalleled. This comprehensive guide has given you an overview of the entire process from researching components to making customizations and maintaining your system.
Hopefully, after reading this guide, you have gained the confidence to build your own gaming PC. To help you on your journey, here are a few more tips to consider:
- Choose components that are compatible with one another to avoid compatibility issues.
- Keep your system clean and dust-free, as debris can cause components to overheat or malfunction.
- Monitor your PC’s performance regularly and check for any potential issues.
- Upgrade your components periodically for improved performance.
- Back up your data regularly to prevent loss due to hardware malfunctions or software conflicts.
Building your own gaming PC is the perfect way to customize the perfect system for your unique needs. With enough research and patience, anyone can build their own gaming PC, and with this comprehensive guide, you’re now ready to embark on your journey!
comments: 0


